Usage
Usage
- Run
- Click on File→Open at the top-right corner of the window and open the whisker-video file which you want to perform whisker-tracking on.
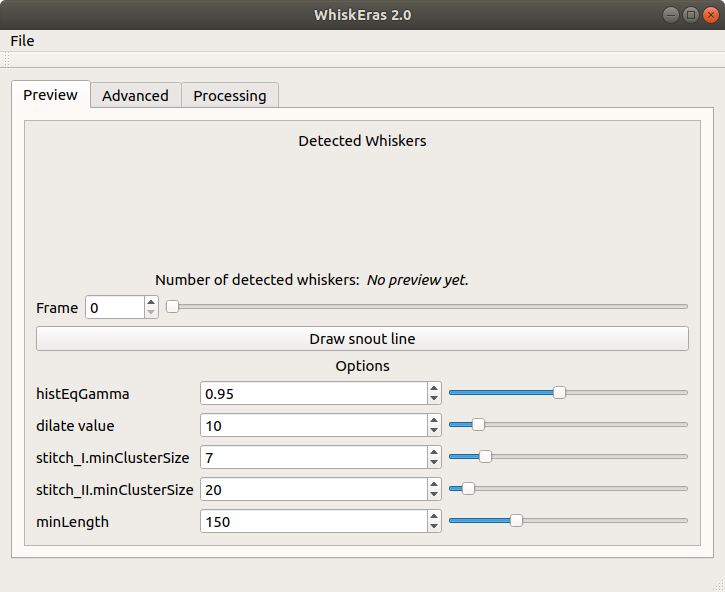
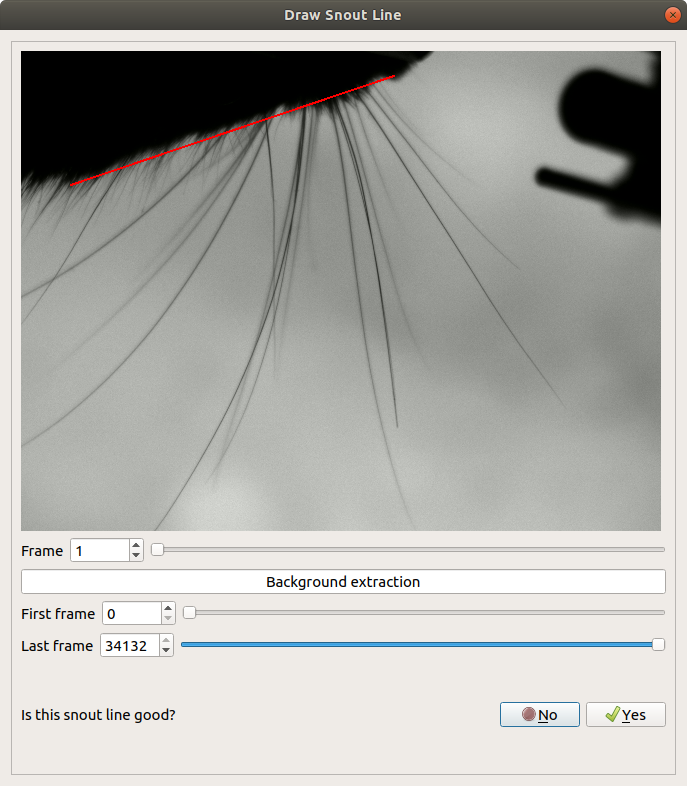
- Click on the Draw snout line button in the Preview tab (or in Advanced tab). In the prompted window, draw a line on the the edge of the snout: click once on the frame to place the starting point of the line, then click once more to place the ending point of the line. If you are satisfied with the snout line drawn, click yes on the prompted question, otherwise click no and redraw the snout line. For videos of type A, where only one side of the snout is visible, draw the snout line as shown in image below. For videos of type B, where the whole snout is showing, only draw the left-side snout line on the image, also shown below. The algorithm is designed to detect and track whiskers only on one side of the snout.
- Preview whisker-detection results. You can view results from different frames of the video, simply by changing the frame index. In addition, the most important and tunable parameters are presented at the bottom of the Preview tab. You can observe the different results as you alter these options on-the-fly. For get an insight of the algorithm and how each parameter functions and influences results, read the parameter-tuning guide.
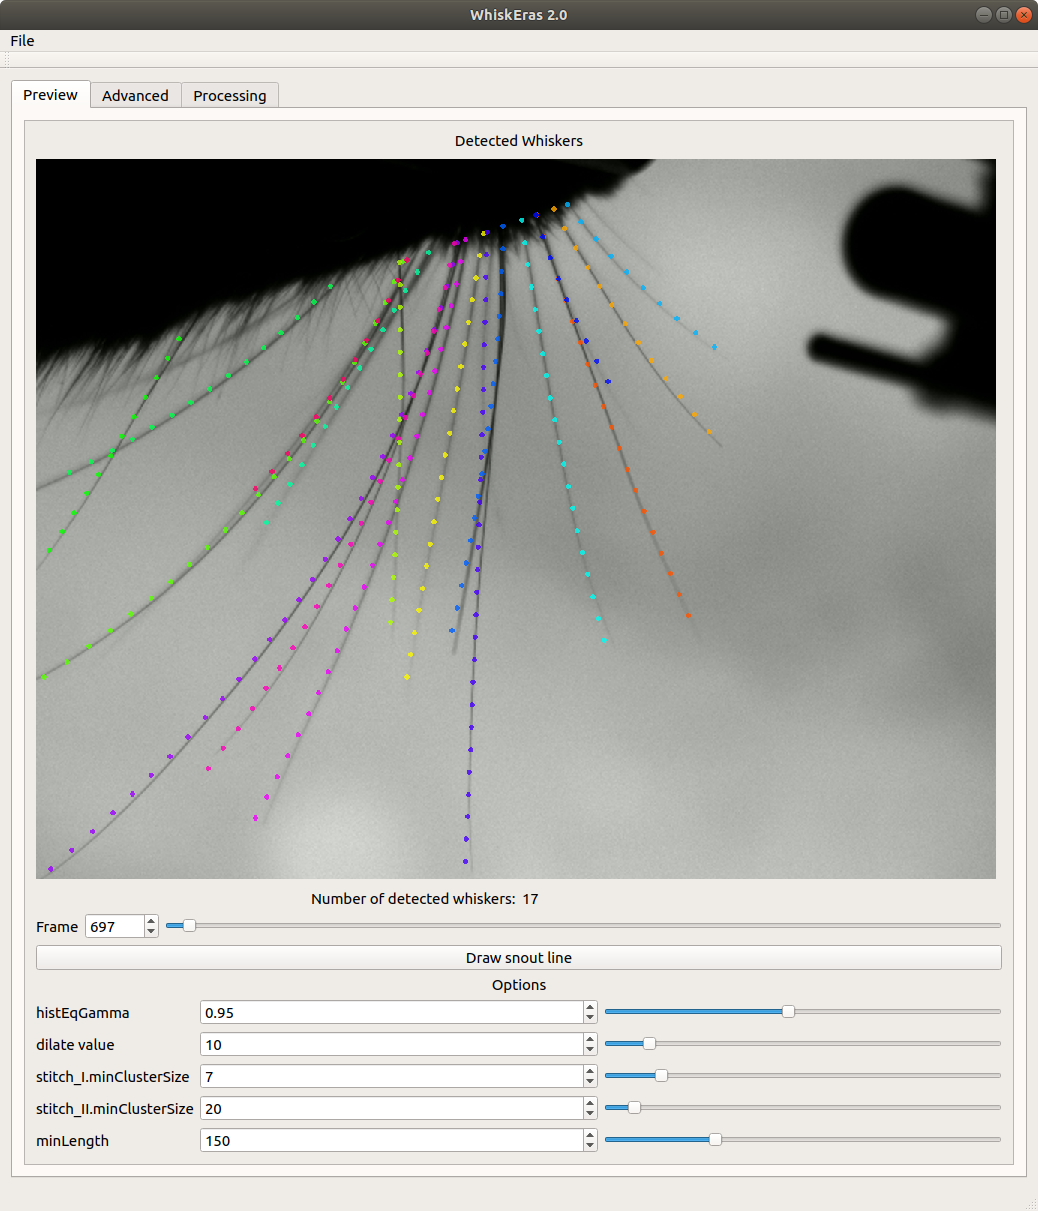
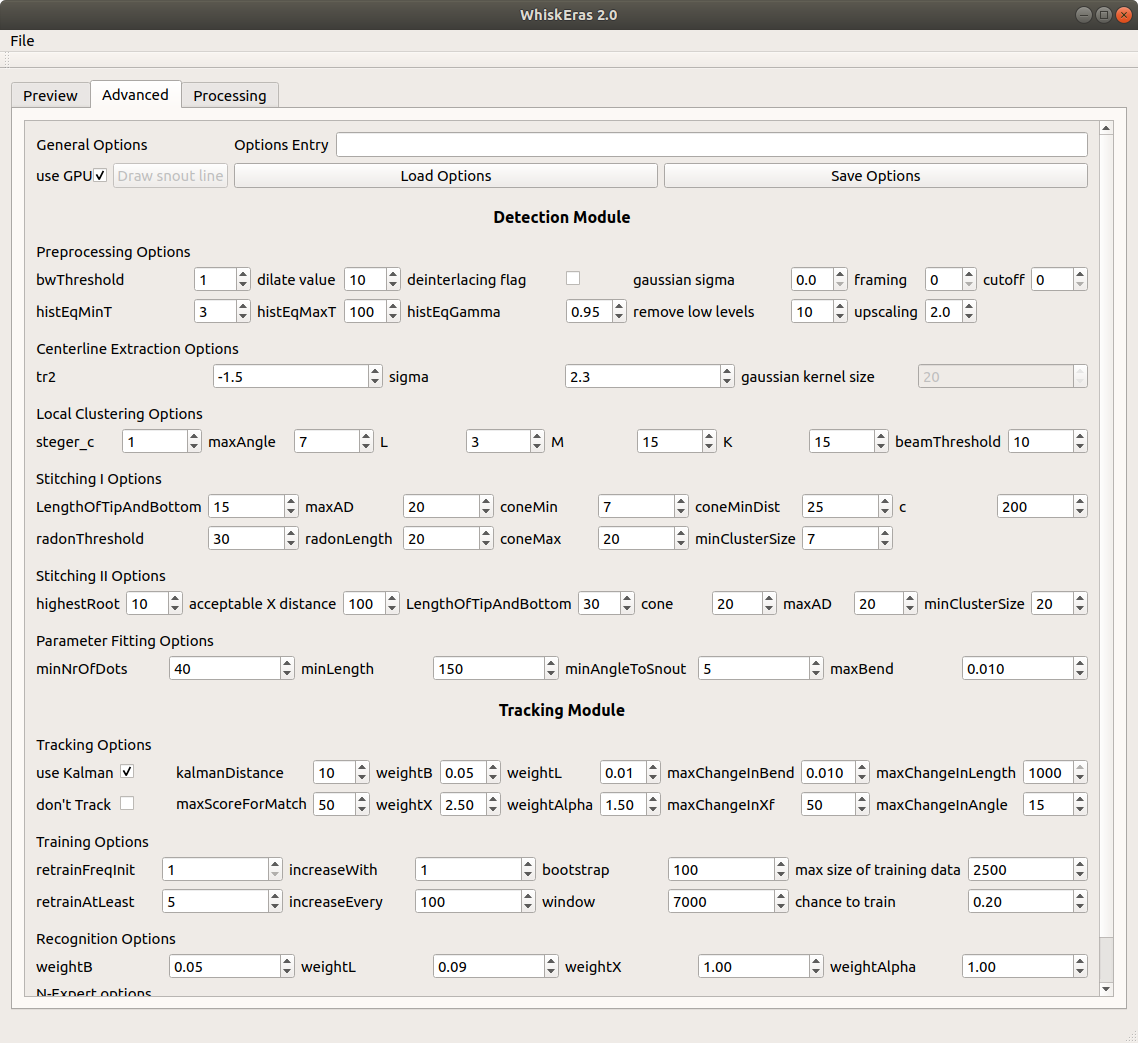
For more advanced users, the Advanced tab allows the user to specify every parameter value of WhiskEras 2.0. Note that only the Detection Module options alter detection results, thus generate a different preview of the results. Tracking Module options only concern how the algorithm tracks whiskers over time. Additionally, you can save all options using the Save Options button and load them back by pressing Load Options. These options are saved in the machine's registry file, associated with this application. You can save and load different sets of options by specifying a name for your options in the Options Entry, e.g "Settings Video A" or "Settings Video B". The default Options Entry name is blank.
- To track whiskers over the video duration, go to the Processing tab. You can change the first and last frame to run over a smaller segment of the video. You can specify the directory where results will be saved by pressing the button next to Output Dir., with a filename identical to the video being processed. Start processing the video by hitting the Start button. You also have the option of stopping the processing midway through, by clicking Stop. In that case, results up to that point of processing will be generated.
Another option is to output a video, with the tracking results, similar to the preview. This can help you assess the quality of tracking during processing. It can be enabled by checking the box next to Tracking Video Output Dir. and specifying a directory path for the video output.
WARNING: by enabling the Tracking Video Output, processing becomes significantly slower. You are advised to do this only for small video segments.

Also, if part of the video is either not processed or unwanted (e.g black frames), these can be removed from the background extraction stage, by moving the sliders of First frame and Last frame to exclude them. This option has been included because the program was found to crash when involving black frames during background extraction, using a GPU.
Note: it is not important whether the line starts and ends at the edges of the image itself to capture the whole snout showing. But, it is important for the middle of the line to be approx. at the center of the snout shown, i.e you should not draw a line which ends midway of the snout.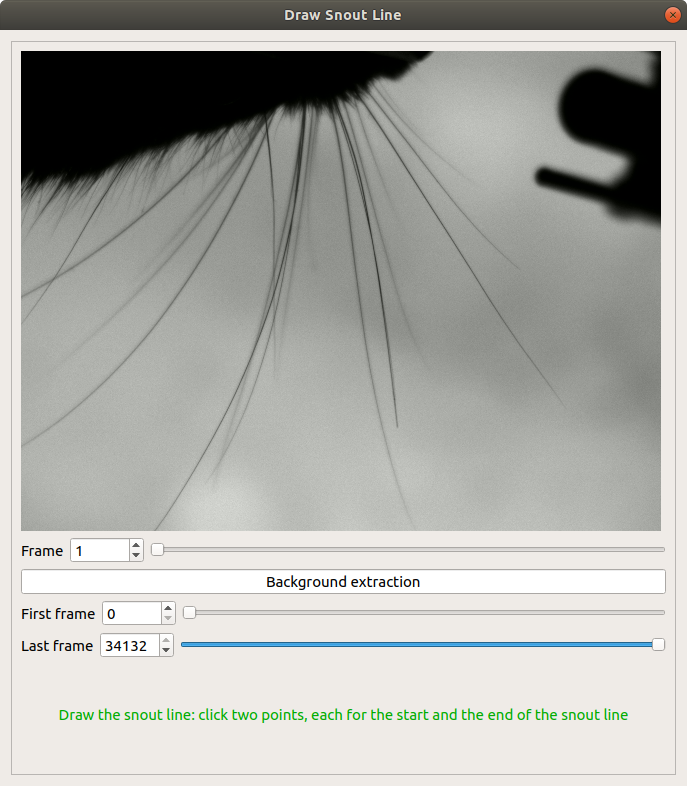
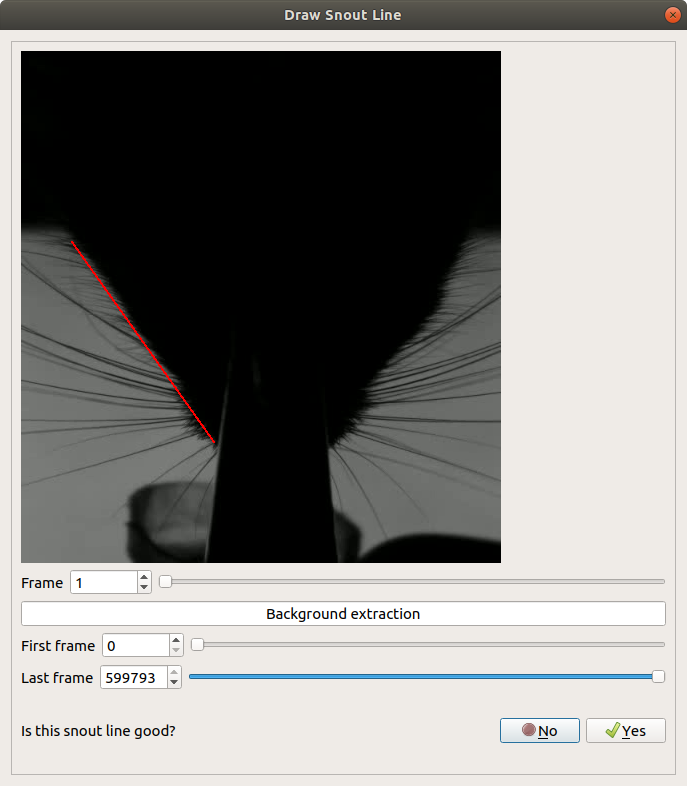
If the whiskers which need to be tracked grow upwards from the snout, then check the box Whiskers grow upwards. For example, in the image below, whiskers on the upper side of the snout are going to be tracked.
